Hood
Open the hood and secure it in the open position.
Disconnect the windshield washer hose. It is recommended to tie a piece of twine to the connector so that it does not fall into a hard-to-reach place.
If the same hood is being installed again, mark the position of the hinges on the hood.
Carefully pull back the insulation from the hood hinges.
With the help of an assistant, secure the hood, then unscrew the hinge bolts and remove the hood from the car. If the same hood is to be installed again, place it carefully on a piece of cloth or cardboard so as not to damage the painted surfaces.
Installation is carried out in the reverse order of removal, taking into account the following.
If a new hood is being installed, prepare everything necessary for fastening (rubber shock absorbers. lock latch, etc.).
If necessary, trim the hinges to the previous marks on the hood.
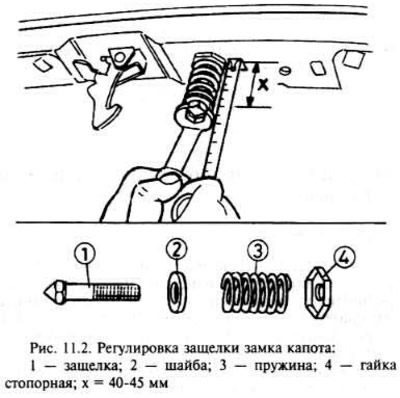
If the latch of the lock has shifted, adjust it according to the dimensions, as shown in fig. 11.2. then tighten the lock nut.

If necessary, adjust the hinge bolts and rubber grommets so that the hood closes well.
A loop
Remove the hood as described earlier in this section.
Remove the windshield fairing panel as described in the previous section.
The hood hinges are riveted to the body panels and to remove them, you will have to drill or grind the head of the rivet.
After removing the head of the rivet, knock it out and remove the loop.
To install the hinge, you will need a bolt with a washer to replace the rivet.
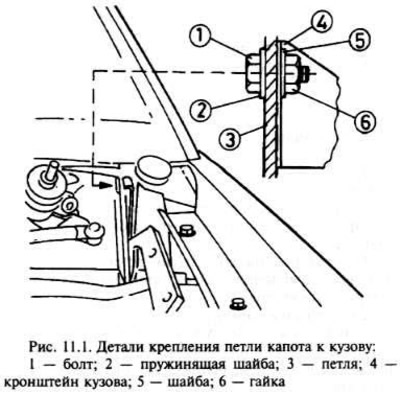
Fasten the loop with a bolt (pic. 11.1).

Install the windshield fairing panel, see previous section.
Install the hood as described in this section.

Visitor comments