Removing
Disconnect both battery leads.
Remove the hood as directed in chapter 11, and on models equipped with an engine with two camshafts, and a lower mudguard.
Drain the coolant from the cooling system as directed in chapter 1 and remove the radiator (chapter 3).
Drain the engine oil, and on 1.8 and 2.0 liter engines, remove the filter.
Remove the air cleaner, air lines, and air shroud from the carburetor or throttle body (chapter 4). Where required, on carbureted and single point fuel injection engines, disconnect the hot air hose from the exhaust manifold housing and air cleaner.
Remove the alternator as directed in chapter 12.
Where required, remove the power steering pump as directed in chapter 10.
Disconnect the intake manifold vacuum brake booster hose.

Disconnect the cable from the throttle control pedal.
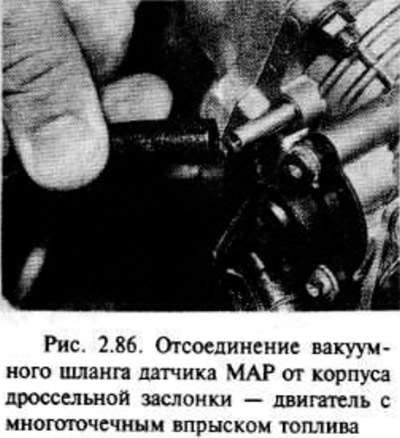
Disconnect the vacuum hoses from the carburetor or throttle body (where required), noticing their location.

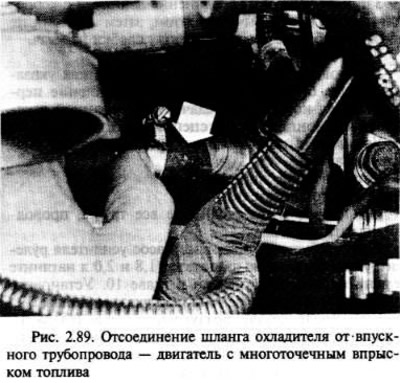
Disconnect coolant hoses from intake manifold and/or throttle body.


On carbureted engines, disconnect the coolant hoses from the auto choke body and the wiring from the auto choke heater and solenoid. Where required, disconnect the air casing vacuum tube from the carburetor.
Depressurize the fuel system, then disconnect the hoses from the fuel pump and vapor separator on carbureted engines, or from the fuel injection unit. Install plugs to prevent fuel leakage.
On engines with fuel injection, disconnect the wiring and connectors, noting their location.
Disconnect the coolant heater hoses from the rear of the cylinder block and from the cylinder head or intake manifold where required.
On engines with two camshafts, disconnect the oil cooler pipes from the oil pump.
Disconnect the wiring from the following items (on some models, a single multi-pin connector can be used, eliminating the need to remove individual connections):
- Starter
- Ignition distributor/ignition coil (note the location of the high voltage wires).
- Oil pressure sensor.
- TDC sensor (where used).
- Oil level sensor (where used).
- Knock sensor (on engines with two camshafts).
- coolant temperature sensor (where used).
- Temperature sensor.
Make sure all proper hoses and wires are disconnected and out of the engine.
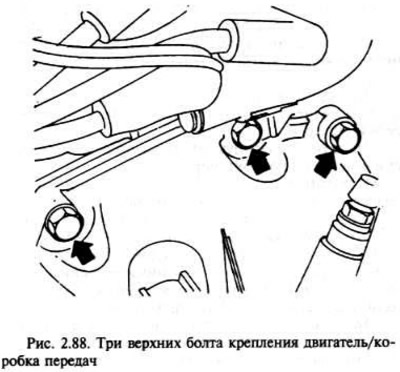
Remove the top three engine and gearbox mounting bolts (access through the engine compartment), noticing the location of the brackets.

With the handbrake on, jack up the front of the vehicle and support it securely on the axle stands.
Remove the crankshaft pulley.
Remove the front section of the exhaust system (chapter 4).
On models where the clutch mechanism can be removed from the engine and gearbox (chapter 6), remove it.
On models where it is impossible to remove the clutch from the engine and gearbox (see chapter 6), disengage the gearbox input shaft from the splined bushing of the clutch friction disc. This operation is described in chapter 6.
Remove the transmission cone cover.
Using a hoist and rigging, hang the engine from the cylinder head brackets.
Support the gearbox with a jack by placing a piece of wood to distribute the load.
Remove the four lower bolts connecting the engine to the gearbox (noticing the location of the brackets), then disconnect these units. Don't forget that the gearbox is mounted on pins on the cylinder block.
Carefully lift the engine out of the engine compartment with a hoist.
After removing the engine, the gearbox can be supported with a wooden spacer between the casing and the front suspension subframe. After that, take the jack away from the gearbox.
Installation
After raising the front of the vehicle and placing it on stands under the axle, support the transmission with a jack with a wooden pad, then remove the previously installed support between the casing and the subframe.
Slowly lower the suspended engine on the lift into place in the engine compartment.
Connect the engine and gearbox, taking into account the presence of dowel pins in the cylinder block, then install the three upper engine and gearbox mounting bolts (brackets must be in place), but do not fully tighten them at this stage.
Install the four lower engine-to-gearbox bolts (brackets must be in place), and again do not fully tighten them at this stage.
Apply threadlocker to the engine-to-body bolts, then move the engine and gearbox as needed to install the bolts and tighten them to the correct torque.
Tighten all bolts connecting the engine to the gearbox to the required torque, then disconnect the rigging and remove the jack from under the gearbox.
Install the gearbox housing.
Install the clutch where required, as indicated in chapter 6, and/or engage the transmission input shaft with the splined bushing of the clutch friction disc (chapter 6).
Install the front section of the exhaust system (chapter 4).
Install the crankshaft pulley.
Lower the engine.
Install and connect all pipes, wiring, hoses.
If required, install the power steering pump, and on 1.8L and 2.0L engines, tension the pump belt as indicated in chapter 10. Install the alternator and tighten the belt as indicated in chapter 12.
Install air cleaner parts (chapter 4), and on carbureted engines - a hot air hose to the exhaust manifold casing.
Fill the engine with oil; if required, install a new oil filter.
Install the heatsink as directed in chapter 3, and fill the cooling system.
Install the hood (chapter 11), and on engines with two camshafts - the lower mudguard.
Connect battery leads.
If required, bleed the power steering fluid as directed in chapter 10.

Visitor comments