Cleaning
Use a scraper to remove any traces of gasket material and sealant from the surfaces of the cylinder head, being careful not to damage them.
Remove carbon deposits from the combustion chambers and holes, thoroughly flush the head with kerosene or a suitable solvent.
Remove all carbon deposits from the valves, then use a wire brush to remove the carbon deposits from the valve heads and stems.
Cylinder head inspection
Carefully inspect the cylinder head for cracks, signs of coolant leakage, and other damage. If cracks are found, a new cylinder head must be installed.
To determine the suitability of the block head mating surface, use a ruler and feeler gauge. If the deviation from out-of-flatness is exceeded, it is possible to finish the surface, provided that the overall height of the head does not decrease beyond the allowable size.
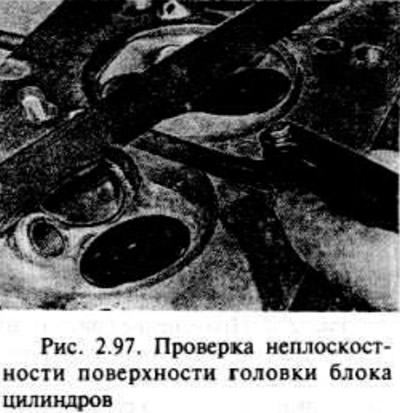
Inspect valve seats in all combustion chambers. If there are pits, cracks, they must be processed by grinding in a mechanical workshop. If pitting is noticeable, it can be removed by lapping, using first coarse and then fine grinding paste as indicated below.
If the valve guides are worn, resulting in lateral movement of the valves, they can be reamed or valves with larger stems can be supplied. This job is best done by an engine rebuilder. You can determine if the valve backlash exceeds the maximum allowable value using a gauge with a dial indicator.
Check the valve lifter bores in the cylinder head for wear. If excessive wear is evident, the cylinder head should be replaced. Also check the oil passages in the cylinder block for contamination.
On 1.8 and 2.0 liter engines, the pressure regulating valves are inserted into the lubrication channels in the cylinder head. The valve can be replaced if damaged or not working properly; access to this valve is through an annular plug that closes the end of the valve. The old valve must be crushed, the debris pulled out, threaded in the valve seat (M10), to screw in the bolt and pull out the socket. The new valve and plug are put in place. Given the complexity of the operation, it is recommended that the valve be replaced by an Opel workshop.
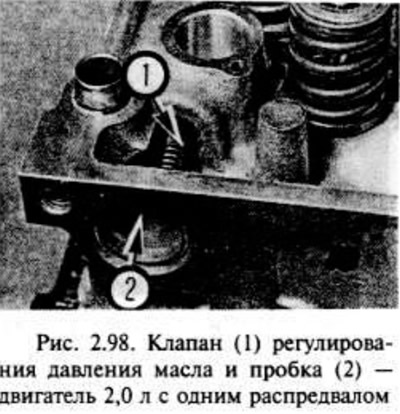
On 1.8L and 2.0L single cam engines, always replace the O-rings between the cylinder head and thermostat housing when the head is removed for repair.
Valve Inspection
Caution: Exhaust valves on twin cam engines are filled with sodium to improve heat transfer. It is a metal that spontaneously catches fire or explodes on contact with water (including air vapor). Valves containing sodium must not be disposed of with waste.
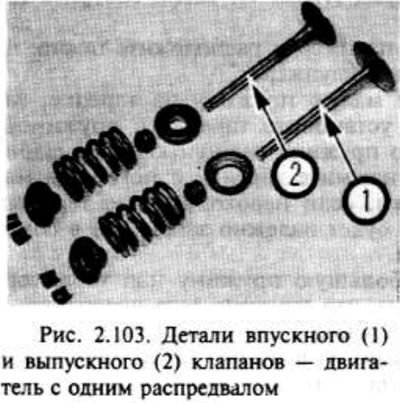
Check each valve head for pitting, carbon deposits, cracks, and wear, and check the valve stem for scratches and worn edges. Rotate the valve along the axis to check for distortion. Check for pitting and wear at the ends of each rod. If the condition of the valve is satisfactory, it is necessary to measure the diameter of the rod at several points with a micrometer. Any significant deviation from the norm in the readings indicates the wear of the rod. If one of these phenomena occurs, the valve must be replaced. If the valves are in satisfactory condition, they should be ground (grind), fitted to the saddles, to ensure a gas-tight joint.
Check if all valve springs are intact. If at least one burst, everything must be replaced.
Rocker Arm Parts - Single Cam Engines
Check rocker arm and ends (areas that are in contact with the tappets and valve stems) to detect corrosion and wear. scratches or any other defects. Check the contact surfaces of the rocker arm and camshaft. Clean the oil passage at the top of the rocker arm with a piece of wire. Install new rocker arms, or if defects are found.
Valve lifters - single camshaft engines
Check the tappet holes in the cylinder head for wear. Replace the head if necessary.
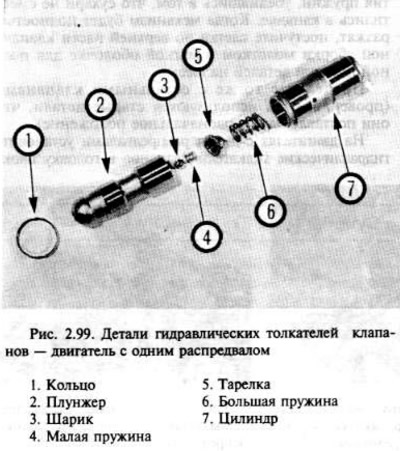
If deposits of dirt have accumulated on the valve lifters, we recommend disassembling and cleaning the hydraulic valve lifters, as is necessary for any repair of the cylinder head.
Carefully remove the valve ring from the top of the valve lifter cylinder.
Pull the plunger out of the cylinder and remove the spring.
Using a screwdriver, carefully lift the poppet off the plunger base, remove the spring and ball from under the poppet, being careful not to damage them.
Rinse all parts thoroughly with kerosene or a suitable solvent and then wipe dry with a lint-free cloth. Carefully inspect the springs - if they are in poor condition, install a new set of pushrods.
Lightly lubricate the parts with an appropriate brand of engine oil (Chapter 1), then assemble them properly.
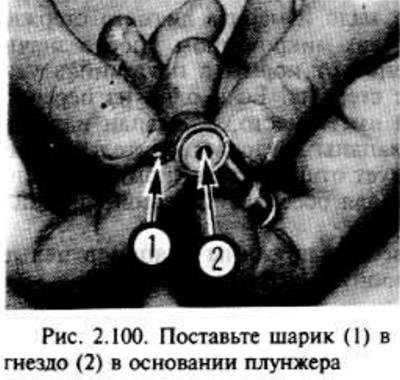
Turn the plunger over and position the ball in the socket at the base of the plunger.
Position the small spring on the plate, then carefully install the spring plate, making sure that the spring is located on the ball. Gently press the plate with a small screwdriver, if necessary, until. until the flange is securely seated in the plug base.
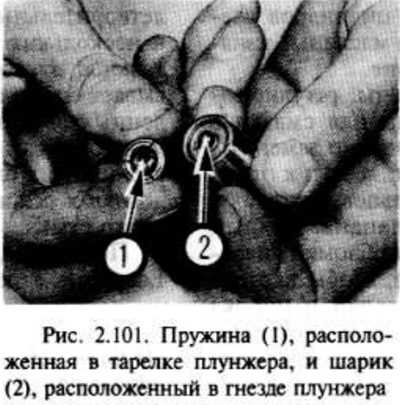
Position the large spring over the poppet, making sure the spring is properly seated, and insert the plunger/spring assembly into the cylinder.
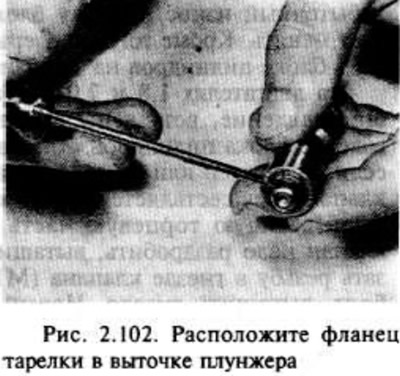
Slide the ring over the top of the plunger and gently push the plunger until you push the ring down and seat it on the cylinder recess.
Valve lifters - twin cam engine
Note: Valve lifters, once removed from the cylinder head, should always be stored upright in a container of clean engine oil.
Inspect the valve lifters for signs of lip wear and the oil passages for contamination, especially sediment. If there is obvious wear (which is unlikely), all pushers should be replaced as a set.

Visitor comments