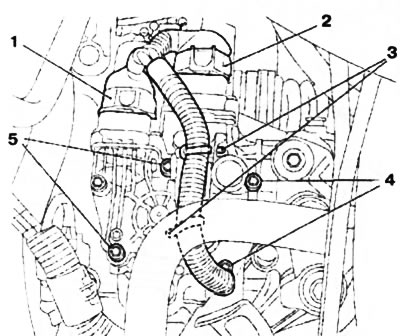
2. Disconnect the harness connectors from the control module, loosen the mounting clamps and move the harness to the side (see resist. illustration). Remove the 4 mounting bolts and remove the shift control module from the manual transmission housing.

12.2. Shift Control Module Mount (Easytronic): 1, 2. Wiring harness connectors; 3. Clamps for fastening the wiring harness; 4, 5. Module fixing bolts
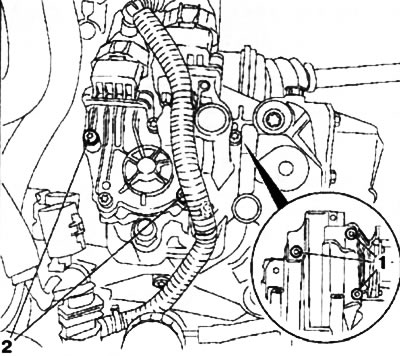
3. If the control module fails, it may not be possible to remove it in the above way. In this case, it is necessary to remove it in parts: first the gear selector, and then the gear changer, for which unscrew the corresponding fixing bolts (see resist. illustration).
Attention: If the module was removed in this way, it must be replaced without fail!

12.3. Fixing the component parts of the gearshift control module (Easytronic): 1. Gear selector bolts; 2. Bolts of fastening of the device of a gear change
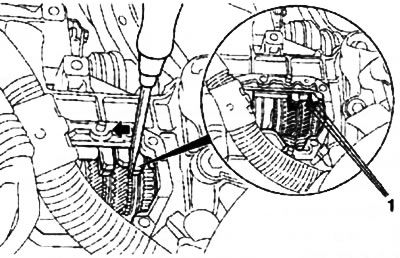
4. If, when removing the failed module, any gear remained engaged, it is necessary to press the gear shift fork to the neutral position with a screwdriver (see resist. illustration).

12.4. When set to neutral, all 3 forks (1) gear shifting (except for reverse gear) should fit (Easytronic)
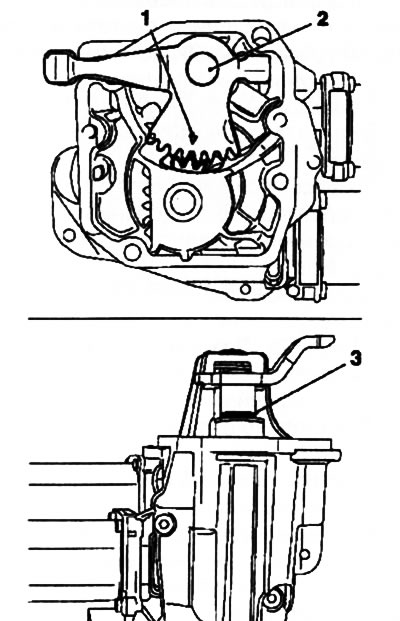
5. When installing the module gear lever must be in the neutral position, for which it is necessary to align the mark on the gear sector of the lever with the tooth head of the drive gear of the gear shift motor (see resist. illustration), while the groove on the shaft must be visible and its edges must be flush with the sealing sleeve.

12.5. Installing the shift lever (Easytronic): 1. Label; 2. Lever shaft; 3. Groove
6. Tighten the module mounting bolts and reinstall all removed components.

Visitor comments