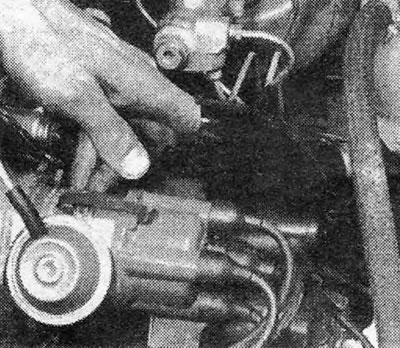
Photo 3.1. Removing the protective casing of the distributor cover.
2. Release the clamps of the distributor cover and remove it.
3. Wipe the cover outside and inside with a dry cloth. Clean the deposits from the 4 electrodes and inspect the cover for cracks and damage. Inspect "ember" in the center of the lid. It should protrude approximately 6 mm. Replace the cap if it is cracked or if the high voltage electrodes are corroded, worn or cracked (see photo).

Photo 3.3. The inner surface of the distributor cover.
4. Remove the slider and wipe the end clean.

Photo 3.4. Removing the runner.
5. Remove the plastic plate that covers the contact breaker, protecting it from condensation. There is no need to remove the base plate (see photo).

Photo 3.5. Removing the plastic plate covering the breaker.
6. Carefully move the breaker contacts apart and inspect their surfaces. If they become uneven, pitted, or dirty, they will need to be replaced.
7. If the contacts are in good condition or after installing new contacts, measure the gap between them by turning the engine so that the breaker lever is at the top of one of the 4 circuits of the breaker cam (For the required thickness gauge size, see Specifications). Be careful not to oil the contact surfaces (see photo).

Photo 3.7. Checking the gap between the breaker contacts.
8. If the gap between the contacts is too large or small, loosen the breaker mounting screw. Move the fixed contact to obtain the desired gap and secure it in this position by tightening the set screw on the breaker support plate.
9. Check the clearance again to make sure it has not become loose when the set screw is tightened.
10. Reinstall the plastic plate, slider and distributor cover with its moisture-proof casing.
11. On modern engines, setting the gap of the breaker contacts using a thickness gauge should be considered as basic. To ensure optimal engine performance, it is also necessary to adjust the contact angle, which is the angle in degrees through which the breaker cam rotates during the time between the moment the contacts close and the moment they open. Correctly setting the angle of the closed state of the contacts allows not only to achieve more accurate adjustment of their gap, but also to compensate for changes in the gap that can be caused by wear of the distributor shaft and its bushings or by differences in the height of the protrusions of the breaker cam.
12. The contact angle is measured using a special device connected in accordance with the manufacturer's instructions. The correct angle of the closed state of the contacts is indicated in the Specifications. If the angle is too large, you should increase the gap between the contacts; if it is too small, reduce it.
13. Before adjusting the ignition timing, you should always check and adjust the angle of the closed state of the contacts.

Visitor comments