Dismantling of fender liner
The plastic fender liner prevents the formation of dirt pockets in the corners of the wheel arches, as In such places, corrosion prefers to develop.
Front fender liner: Raise the vehicle and remove the corresponding wheel.
Where present, unscrew the cover under the bumper.
Loosen one torx head bolt each at the top and bottom end of the bumper.
Unscrew the three plastic nuts in the wheel arch.
Next, remove the corresponding spacer rivets in the wheel arch and at the bottom of the channel.
Rear fender liner: Raise the vehicle slightly.
Remove one torx head bolt each at the top and bottom end of the bumper.
At the rear, in the wheel housing, unscrew one torx head bolt.
Remove the two spacer rivets at the front in the wheel arch.
For everyone: to remove the pop rivet, press the plastic pin in the middle of the clip with a small Phillips screwdriver or a suitable punch and pry the pop rivet out.
Remove the fender liner from the wheel arch.
For installation, stock up on new spacer rivets, because. during dismantling, most often the plastic pins disappear in the body.
Wing dismantling
Remove the grille.
Remove the bumper.
Remove the cover.
Use masking tape to protect the lower edge of the bonnet, the A-pillar and the door in the front area from damaging the paintwork.
Remove the four bolts at the top edge of the wing.
If necessary, remove the turn signal housing, see chapter «Lighting».
Loosen the mounting bolt on the front of the fender below the turn signal.
Remove the side direction indicators, see chapter «Lighting».
Unscrew along the rack A and under the channel as a whole three bolts.
Carefully press the fender away from the body so as not to damage the paintwork.
Remove all remnants of the old sealant and seal the adjacent surfaces with sealing compound.
Fit the new wing. At the same time, pay attention to the gap relative to the door and hood.
Tighten the mounting bolts.
Apply protective wax to the inside of the wing.

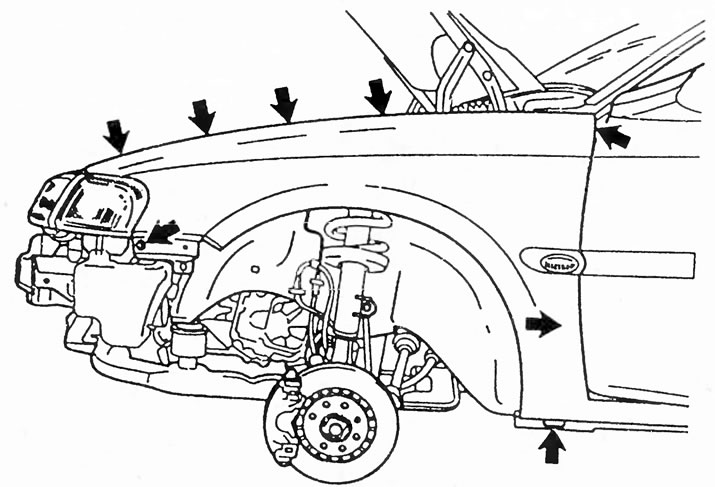
The figure shows all the attachment points of the left wing. First you need to dismantle the bumper and fender liner.

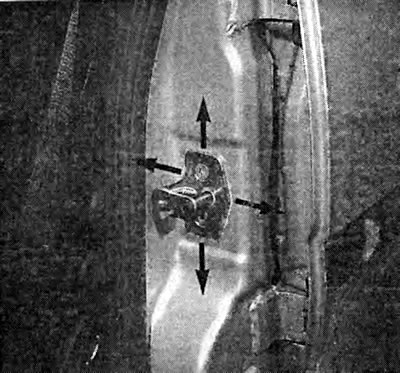
The locking bracket, after loosening the torx head bolts, can be moved to fit the rear edge of the door.

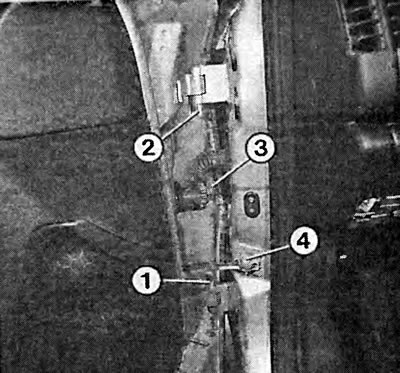
When dismantling the door, the following parts must be dismantled: 1 - lower clamping sleeve; 2 - upper clamping sleeve; 3 - multi-pin connector; 4 - door brake.
Removing body side moldings
Remove the molding from the adhesive. With moldings on the wing, first dismantle the turn signal housings.
Most often this is done after heating with a hair dryer, and even then it is hardly possible to remove the molding without damaging it. Buy a new one.
Clean the adhesive area on the metal with gasoline and silicone remover.
Heat up the new molding with a hair dryer (not higher than 80°C), if the outside temperature is below 18°C.
Remove the protective film from the molding.
Insert the molding with the position clips into the holes, attach section by section to the body and press in the bonding area - especially at the ends.

Visitor comments